With Interactive Canvas you can now use your voice to draw graph data!
Interactive Canvas allows the developer to incorporate a web app in an Action for Google Assistant.
This is awesome, since now developers are not limited by a standard set of interfaces anymore, they can define their own content in a new, more engaging and interactive way!
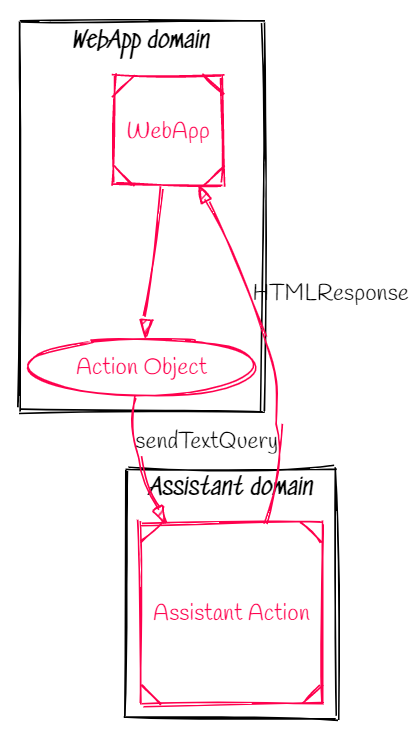
How Interactive Canvas works
With Interactive Canvas, developers can create a conversational Action using HTML, CSS and Javascript.
To fulfill a request, the function specifies an HTMLResponse which forwards requests parameters to a web app.
The web app is embedded into the Action with a webview: after receiving the request and its parameters, the web app fulfill the request (drawing something on screen, playing sounds…) and sends a message to the action.
The Action received this message as if it was a voice activation message and completes the fulfillment.
The Assistant Action defines not only intents to start the interaction with the web app (ie. pushing data to the web app) but also intents to finalize the fulfillment (ie. communicating that the task has been fulfilled to the User).
The app is designed to include the Interactive Canvas API:
action.js registers the callbacks for the interaction with Assistant Action.
setCallbacks() {
    const that = this;
    // declare assistant canvas action callbacks
    const callbacks = {
        onUpdate(data) {
            that.commands[data.command ? data.command.toUpperCase() : 'DEFAULT'](data);
        },
     };
// called by the Interactive Canvas web app once web app has loaded to
// register callbacks
this.canvas.ready(callbacks);
}
Callbacks execute operations on the web app and send a text query to the Action, in order to trigger an action intent and to end the function interaction cycle.
constructor(graphContext) {
this.canvas = window.interactiveCanvas;
const that = this;
this.graphContext = graphContext;
this.commands = {
ADDOBJECT: function(data) {
that.addNode(data.label);
},
ADDEDGE: function(data) {
that.addEdge(data.from, data.to, data.label);
},
DEFAULT: function() {
// do nothing, when no command is found
},
};
}
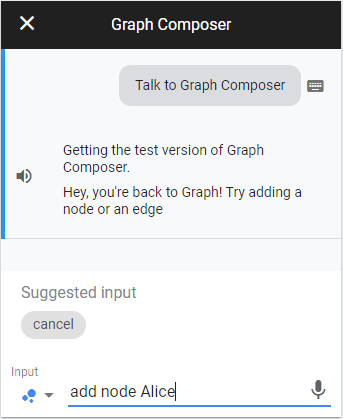
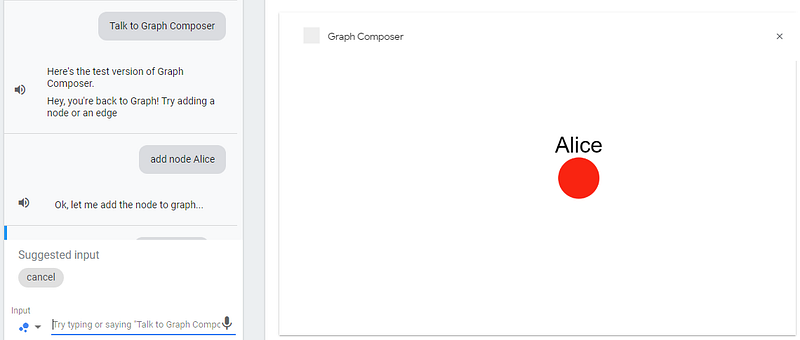
app.intent('addNode', (conv, {label}) => {
conv.ask(`Ok, let me add the node to graph...`);
conv.ask(new HtmlResponse({
data: {
command: 'ADDOBJECT',
label
},
}));
});
Important: Assistant Interactive Canvas API is not the same object as the canvas object in an HTML page!
Developing the Action
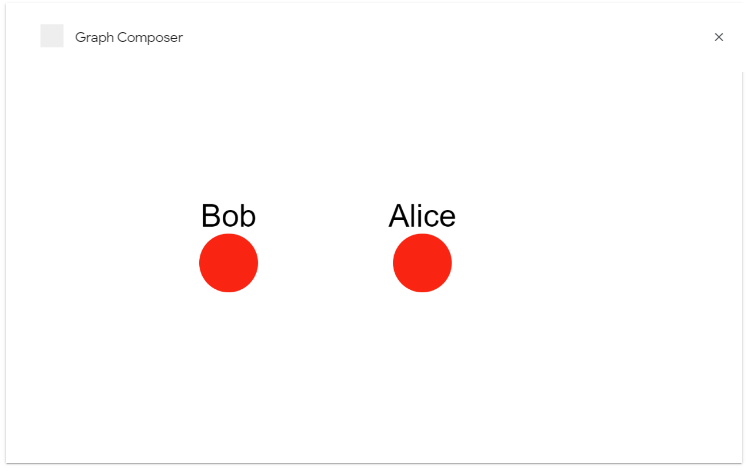
You will develop a small Action for Assistant embedding a web application which uses cytoscape.js to compose graph using your voice.
Cytoscape.js is a javascript library which allows developers to easily manage graph, offering methods to add or remove nodes and edges and some basic functions to calculate some graph metrics. To begin, login in the Action On Google Console e create a new Canvas Project: you can follow the Interactive Canvas walkthrough to know how to do this. Take note of the project id.
Once you created the project, log into the Dialogflow console to personalize the training for the intents of the Action. As a proof of concept, you will develop only a small set of functions: “addNode” and “addEdge”.
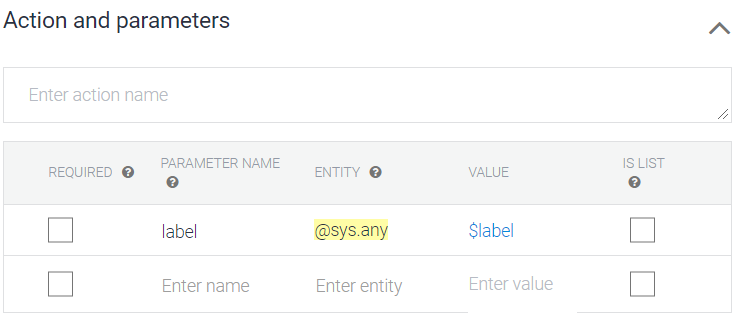
Add the intent “addNode” and set the following entity:
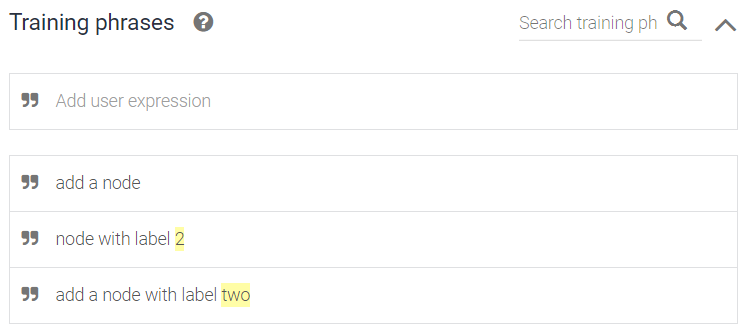
Add the training sentences and tag the label with the entity you previously defined:
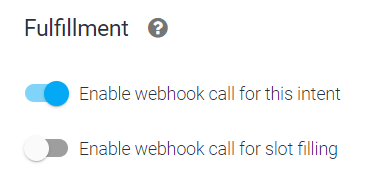
Enable the Webhook call to fulfill this intent:
Add the intent “addEdge” and set the following entities:
Since the “from” and “to” are mandatory, you wull define prompts in case those parameters are missing. You can use a sentence like “please specify a source node!” and “please specify a target node!”.
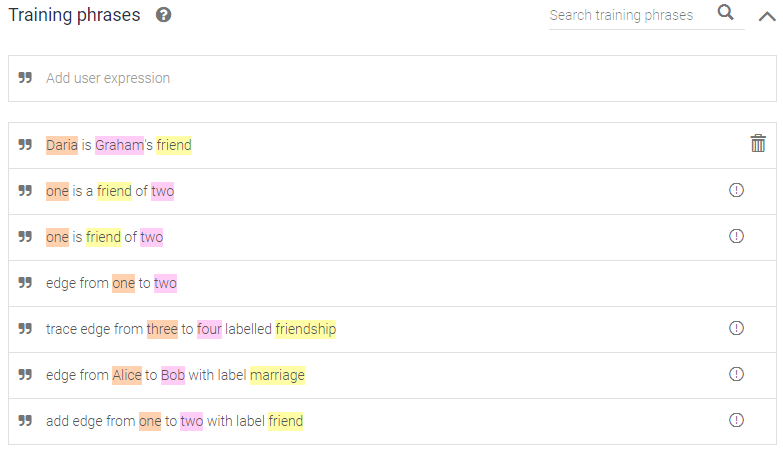
Also, define the following training phrases and tag them:
Enable the webhook call fufillment for the “addEdge” intent.
Enable the webhook call fufillment for the “Welcome” intent, too.
Now you will develop two more intents, “nodeAdded” and “edgeAdded”, to catch web app simulated input and finalize the fulfillment on the Action side:
Observe that “nodeAdded” intent is trained with a single sentence, the one the web app “speak” when the action is completed on its side.
Enable the webhook call fulfillment for this intent, too:
Now develop “edgeAdded” intent:
Enable the webhook call fulfillment for this intent:
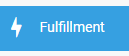
Go to the Fullfilment section by clicking on the menu item on the left:
Enable Inline editor:
Replace the code in the editor with the following one:
'use strict';
const functions = require('firebase-functions');
const {dialogflow, HtmlResponse} = require('actions-on-google');
const firebaseConfig = JSON.parse(process.env.FIREBASE_CONFIG);
const app = dialogflow({debug: true});
app.intent('Welcome', (conv) => {
if (conv.user.last.seen) {
conv.ask(`Hey, you're back to Graph! Try adding a node or an edge.`);
} else {
conv.ask(`Welcome to Graph!`);
}
conv.ask(new HtmlResponse({
url: `https://<PROJECT_ID>.firebaseapp.com`,
}));
});
app.intent('Fallback', (conv) => {
conv.ask(`I don't understand. Try with "add a node with label Alice"!`);
conv.ask(new HtmlResponse());
});
app.intent('addNode', (conv, {label}) => {
conv.ask(`Ok, let me add the node to graph...`);
conv.ask(new HtmlResponse({
data: {
command: 'ADDOBJECT',
label
},
}));
});
app.intent('Node added', (conv, {object}) => {
conv.ask(`node has been added.`);
conv.ask(new HtmlResponse());
});
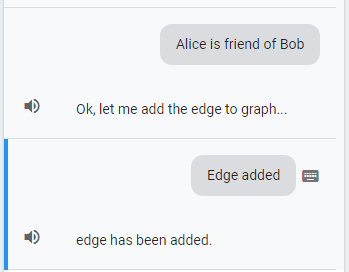
app.intent('addEdge', (conv, {from, to, label}) => {
conv.ask(`Ok, let me add the edge to graph...`);
conv.ask(new HtmlResponse({
data: {
command: 'ADDEDGE',
from,
to,
label
},
}));
});
app.intent('Edge added', (conv, {object}) => {
conv.ask(`edge has been added.`);
conv.ask(new HtmlResponse());
});
exports.dialogflowFirebaseFulfillment = functions.https.onRequest(app);


No comments:
Post a Comment